Friday, September 30, 2011

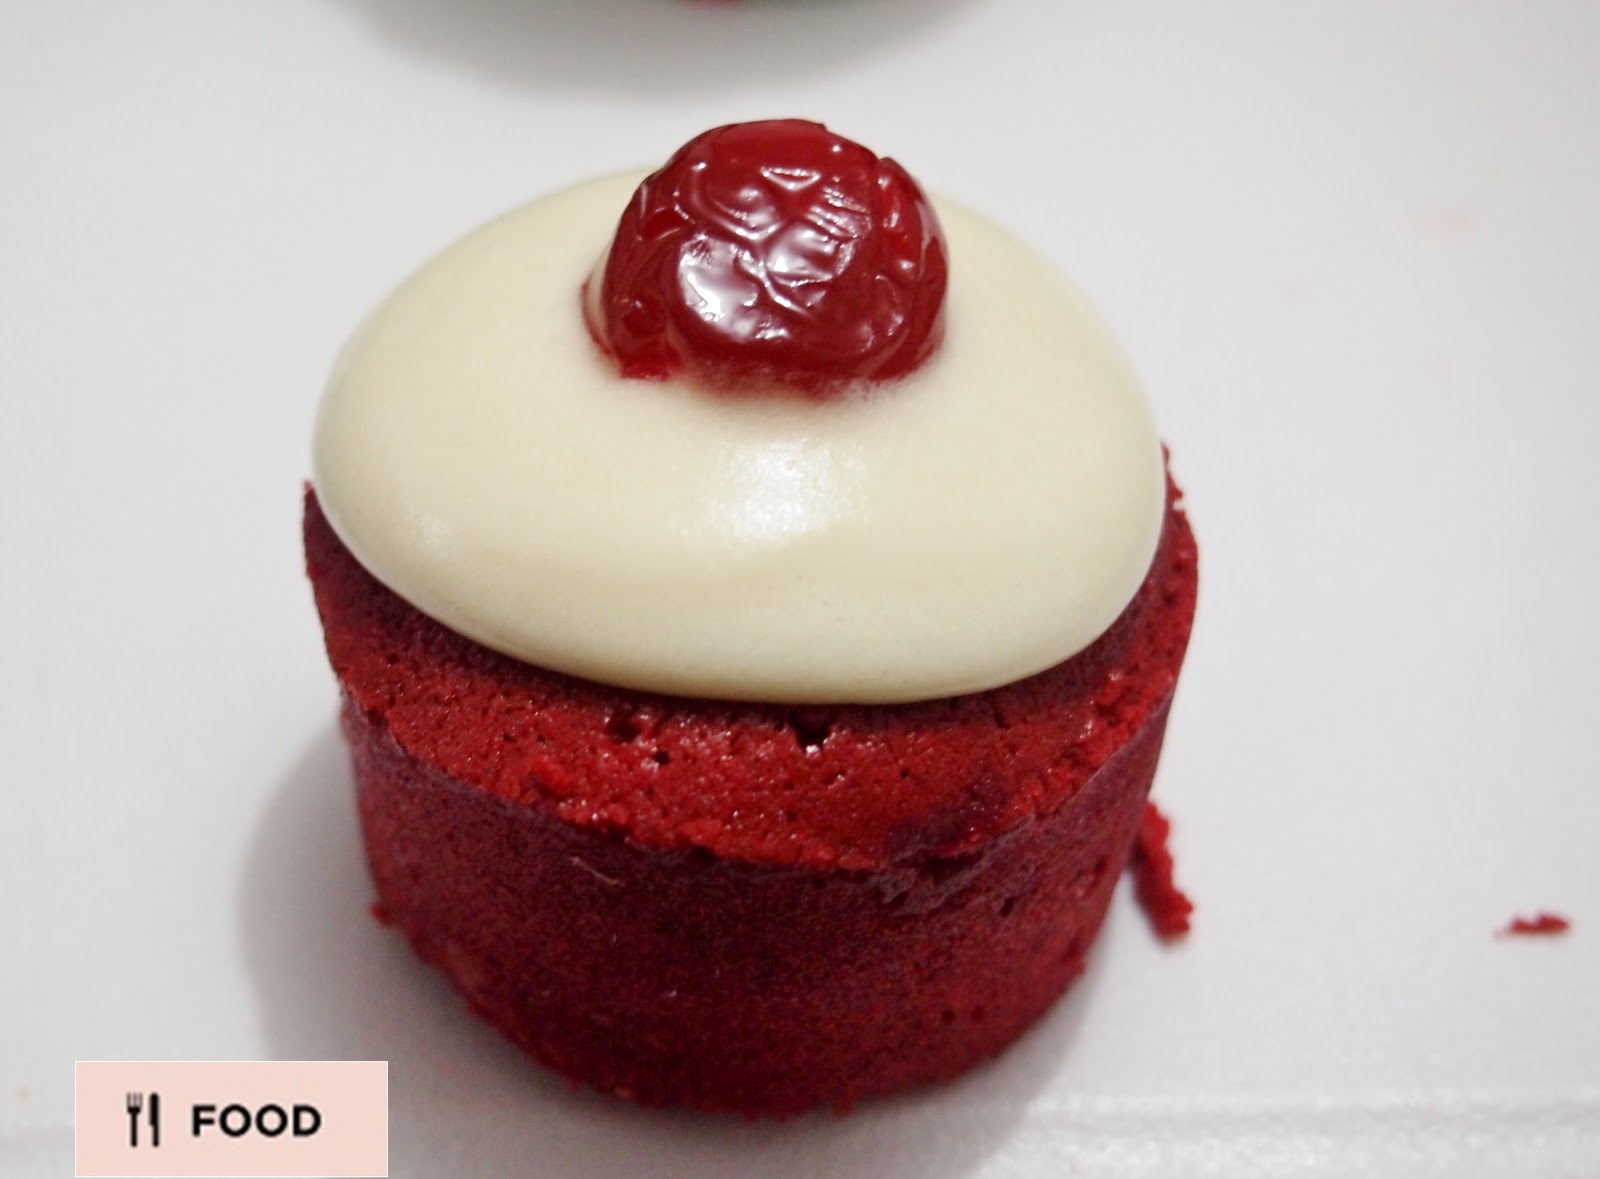
Red Velvet Cupcakes with Cream Cheese Frosting


Yumm....ain't these the cutest cupcakes you've ever seen!!

Red Velvet Cupcakes would have to be one of the most prettiest cupcakes that are out there!!! A beautiful rich red colour, fluffy yet super moist delicious chocolate cupcake, topped with a sweet and creamy cream cheese frosting....mmmm yummmmm!!! One taste and you'll be coming back for more : )

I made these over the weekends, using the new cupcake casings I purchased especially just to make these cupcakes. The casings are so pretty I didn't want to rip them apart when eating the cupcakes hehe

This is my recipe:
Ingredients (makes 30 cupcakes)

2 and a 1/2 cups plain flour
2 tablespoon unsweetened cocoa powder
1 teaspoon baking powder
1/2 teaspoon salt
1 cup butter, softened
2 cups caster sugar
4 eggs
1 cup sour cream
1/2 cup milk
2 tablespoon of red food colouring
2 teaspoons vanilla extract
 
Vanilla Cream Cheese Frosting:
250g tub of cream cheese, softened
1/4 cup butter, softened
2 tablespoons sour cream
2 teaspoons vanilla extract
2 cups of icing sugar

Method:
1. Preheat oven to 180 degrees C. Sift flour, cocoa powder, baking powder and salt in medium bowl. Set aside.
2. Beat butter and sugar in large bowl with electric mixer on medium speed 5 minutes or until light and fluffy. Beat in eggs, one at a time. Mix in sour cream, milk, food color and vanilla. Gradually beat in flour mixture on low speed until just blended. Do not overbeat. Spoon batter into 30 paper-lined muffin cups, filling each cup 2/3 full.


3. Bake 20 to 25 minutes or until toothpick inserted into cupcake comes out clean. Cool in pans on wire rack 5 minutes. Remove from pans; cool completely. Frost with Vanilla Cream Cheese Frosting.


4. Vanilla Cream Cheese Frosting: Beat cream cheese, softened, butter, sour cream and vanilla extract in large bowl until light and fluffy. Gradually beat in icing sugar until smooth.


I also add a glace cherry on top to make them look super adorable!!!


So many cupcakes.....


You will sure win the crowd over with these lovely and delicious cupcakes!

Happy Eating my lovely readers!!
Fat Pom Pom


Friday, September 23, 2011

Chocolate Crackles!


mmmm....remember these? yummmmmm...super awesome!

The last time I had one of these Chocolate Crackles, I was in primary school, where we had one of those school fairs and our parents would cook a dish for us to bring to school to sell and fundraise for the school. There would always be someone's parents who made these Chocolate Crackles and they were sold for around 20 cents. As a kid, I remember these were awesome!!

Only until recently did my boyfriend eat theses again at Melba (Langham Hotel Melbourne) that it reminded me of how much I used to love these chocolate crackles.

This is the recipe for the Chocolate Crackles:

Ingredients

4 cups Rice Bubbles
1 cup icing sugar
1 cup desiccated coconut
250g copha, chopped
3 tbsp cocoa

Method
In a large bowl, mix the rice bubbles, icing sugar, cocoa & coconut.

Slowly melt the copha in a saucepan over a low heat.

Allow to cool slightly.

Add to Rice Bubbles mixture, stirring until well combined.

Spoon mixture into paper patty cases and refrigerate until firm.

Enjoy!!! It's as simple as that : )


They are still as awesome as I remember!

Happy Eating
Fat Pom Pom

Thursday, September 15, 2011

Dinner is Served!


mmmmmm.....I can't wait to eat this again!!!

Hi guys,

Over the weekend I went to a friends house and we all cooked dinner together : ) we used to do this all the time when we were growing up & after we finished high school, we had a lot of spare time and was always cooking together at someone's house or another! These days, we have work commitments, some of my friends are married and a few with little bubs on the way: D

So it's a lot harder to get all the gang together on the one day! The last time we cooked together was probably over two years ago! Me and my friends share the same passion for cooking and food, always exchanging recipes and chatting about the latest episodes of Masterchef or which restaurant to eat at for our next catch up!

Saturday night was fun! Grocery shopping, prepping and cooking all the yummy food that we did that night, and then sitting down at the dinner table together to enjoy and savor our hardwork, not to mention everything tasted awesome!! Good job team! Hehe oh and did I mention we had a super awesome dessert also? Hehe though I was seeing my gang less often these days, it feels like things haven't changed abit when we do : ) it makes me feel happy knowing that!

"Good friends are like stars, you don't always see them but you know they are always there"

So to start of our three course meal, we had home made Bruschetta! You can find this recipe on one of my older post! click here for Bruchetta recipe

For the main course we had Pan Fried Lamb Cutlets in Rosemary and Butter, Beer battered chips, Twice Baked Potatoes, Rian and Tuyen's Special Potato Mash, Steamed Corn, Mixed Salad, and a Creamy Mushroom Sauce!


I would post the recipe for all the above but that would make this post really long hehe if you like the recipe for any of the above, just let me know in the comment box below & I will send you the recipe! If you want the recipe for the Special Mash, I will have to ask my friends about that one hehe


The winner of the night would have to be the dessert! The Deep Fried Icecream with Chocolate Sauce! Everyone was pretty full after the main meal, but for me, I always have a second stomach saved just for desserts hehe

A lot of effort and hard work went into making this delicious dessert (a process of 3 days!!) so I think it would only be right that I give all the credits to my two best friends, Anna and Crystal!!! Thanks for making this super awesome dessert guys!! And with their permission, I am now gonna share with you guys how to prepare and make the best Deep Fried Icecream with Chocolate Sauce that you will ever eat!!!

Ingredients: (serves 4)
4 large scoops vanilla ice-cream
4 eggs
1 madeira cake
2 cups panko breadcrumbs (Japanese-style crumbs)
200g dark chocolate, finely chopped
250ml cream
Vegetable oil, for deep-frying

Method

To make Chocolate Sauce, melt chocolate on a double boiler. Bring the cream to the boil and add to chocolate, whisk the chocolate sauce until it is smooth.


Cut the cake into 8, 1/2cm slices.

Lay 2 slices of cake across each other to make a cross, place 1 scoop of ice cream in the centre and using your hands to mould the cake over the icecream to form a round ball.

Transfer onto a tray and place in the freezer immediately. Repeat with all the ice cream and cake.
Allow the ice cream balls to freeze for at least 1 hour, but the longer you leave it the easier it is to work with when its time to coat (my friends left them overnight)

Beat the egg in a shallow bowl and place the breadcrumbs onto a another plate.
Working with one ball at a time, roll them into the egg and coat with breadcrumbs and then refreeze again. This time for at least 2 hours, but preferably overnight.

When it is time to serve desserts, remove the balls from the freezer, stand for 5 minutes.
Pour oil into a saucepan. Heat on high and it is ready when a piece of bread dropped in turns brown within 15 seconds.


Deep-fry one icecream ball at a time in the oil until it is golden and crispy and drain on paper towel. This should take no longer then 10-15 seconds.


 Serve with Chocolate Sauce and strawberries......


We finished the night on a chocolate high!!! You can't get better then that :D

Happy eating my friends!!
Fat Pom Pom

Wednesday, September 7, 2011

The Art of the Brick!

 
I went to The Art of the Brick exhibition by Nathan Sawaya at Federation Square a few weeks ago.

It was like a walk down memory lane, it brought back alot of my childhood memories : ) For all the Lego lovers out there, whether you played with it as child (and there is still the inner child left in you hehe) or you are the proud parents of a Lego child genius who has stepped on more then their fair share of Lego's (ouch hehe), this exhibition is definitely for you!! Its heaps of fun so check it out while its still running, last day of the exhibition is 30 September 2011.


Something extra for you guys.....there's also a permanent free exhibition at ACMI (across from Federation Square) called Screen Worlds: The Story of Film, Television and Digital Culture. Amazing stuff, I could spend hours here....

Remember these guys!!!! :D


Happy Reading!
Fat Pom Pom

Friday, September 2, 2011

Luke Nguyen's Sate Crabs.

Another awesome recipe from Luke Nguyen!

This awesome recipe I saw on Luke Nguyen's Vietnam show on SBS. I love this show, and as you guys may already know, Luke Nguyen is one of my favourite chefs!!! I love his cooking style and can't wait to try all his recipes : )

I have made this recipe many times, and its still super tasty and delicious everytime! I varied the recipe abit by using corn flour instead of potato starch, and also less Sate Sauce then Luke Nguyen's recipe. I also add an egg in after I add the crabs to the wok, it adds another dimension to the dish.

Ingredient (serves 2 )
3 blue swimmer
Vegetable oil for deep-frying
Corn flour for dusting
3 red Asian shallots, finely diced
2 garlic cloves, finely diced
4 spring onions (scallions), cut into 5 cm (2 inch) lengths
2 long red chillies, thinly sliced on the diagonal
3 tbsp sate sauce
1 egg

This is Luke's Nguyens recipe for Sate Sauce, If you don't have time, you can just buy a good quality pre-made Sate Sauce in asian grocers and Vietnamese restaurants which sells for around $5 small tub.

Sate sauce
200 g crab meat
100 g dried shrimp. Soaked in 1 cup water for 20 minutes & drained
25 g dried chilli flakes
100 ml chilli oil
10 spring onions, sliced (white part only)
½ bulb garlic, minced
½ tbsp sugar
1  tbsp oyster sauce
1 tsp salt
½  tbsp fish sauce
500 ml vegetable oil 

Preparation
Sate sauce

Pour vegetable oil in a wok and bring to medium heat, fry the garlic and spring onion till fragrant. Now add crab meat, shrimps, sugar, oyster sauce, salt and fish sauce. Stir then reduce heat to a low simmer for 30 minutes stirring every 5 minutes. Lastly add chilli oil, stir and simmer for a further 5 minutes.

Use this sate sauce as a dipping sauce for noodle soups or add to stir fry’s.

Refrigerate in an airtight container.

Remove the upper shell of the crab, pick off the gills, which look like little fingers, and discard them. Clean the crab under running water and drain. Place the crab on its stomach and chop the crab in half with a heavy cleaver. Now chop each half into 4 pieces, chopping each piece after each leg. With the back of the cleaver gently crack each claw — this makes it easier to extract the meat.

Heat the oil in a wok on high. Use the chopstick method to test that the oil is hot enough (place the tipe of the chopstick in the pan and bubbles to come up from the sides rapidly). Dust the crab pieces with corn starch, shaking off the excess. Deep-fry the crab in batches for 3 minutes, turning over once, until golden brown. Remove from the wok and drain on kitchen paper. Remove the oil, reserving 2 tablespoons, and clean the wok.

Heat the reserved oil in the wok, then add the shallots and garlic and fry until fragrant. Now add the sate sauce and stir for 1 minute. Add the crab, egg and spring onions and toss, cooking the egg and making sure to coat the crab well. Transfer to a serving bowl and garnish with chilli.


Serve with jasmine rice.

Enjoy and Happy Eating!
Fat Pom Pom

Wednesday, August 24, 2011

The best homemade Pizza ever!!!


         Pizza. I don't think I know anyone who doesn't like Pizzas :)


There's so much variety, types, flavours and toppings to choose from, anyone can enjoy a pizza! My family grew up eating lots of pizza's, they were consider a 'treat' on the weekends from the usual Vietnamese home cooking, and to date, Hawaiian is still my favourite pizza topping! hehe

Pizza's have come a long way for me, and though I still enjoy the occasion Domino's and Pizza Huts, I much prefer my own home made pizzas!

The pizza Dough and Tomato Sauce recipe below are Jamie Oliver's recipe, and they always turn out perfect for me everytime!

As for toppings, you can pretty much put anything you want on!!! But for me less is more, keep the flavours fresh and simple :)  

To make the Dough:


Ingredients (makes 4 large square pizza's)

500g plain flour
1/2 tbsp salt
1 x 7g sachets of dried yeast
1/2 tbsp white sugar
2 tbsp extra virgin olive oil
325ml lukewarm water

Sieve the flour and salt on to a clean work surface and make a well in the middle. In a jug, mix the yeast, sugar and olive oil into the water and leave for a few minutes, then pour into the well. Using a fork, bring the flour in gradually from the sides and swirl it into the liquid. Keep mixing, drawing larger amounts of flour in, and when it all starts to come together, work the rest of the flour in with your clean, flour-dusted hands. Knead until you have a smooth, springy dough.

Place the ball of dough in a large flour-dusted bowl and flour the top of it. Cover the bowl with a damp cloth and place in a warm room for about an hour until the dough has doubled in size.

Now remove the dough to a flour-dusted surface and knead it around a bit. Divide into 4 even size balls and start rolling out to desire thickness of pizza base.

To make Tomato Sauce

olive oil
2 cloves of garlic, peeled and finely sliced,
a bunch of fresh basil, leaves picked and torn
1 x 400g tins of good-quality, whole plum tomatoes
sea salt and freshly ground black pepper

Place a large non-stick frying pan on the heat and pour in few tablespoons of olive oil. Add the garlic, shake the pan around a bit and, once the garlic begins to colour lightly, add the basil and the tomatoes. Using the back of a wooden spoon, mush and squash the tomatoes as much as you can.

Season the sauce with salt and pepper. Cook for about 5 minutes until slighty reduced and then your done. Strain through a sieve if you want to but I like chunky sauce.

As for toppings, This is one of my favourite toppings, if you are a lover of seafood, I think you will really enjoy this pizza topping, I call this my half half seafood!
You will need:

1 large squid tube, cleaned and slice to 1 cm thick (you can leave them as rings, but I like to cut the rings in half.
500g mussels, cleaned and debeard (you can use clams if you like)
a small jar of baby capers
fresh basil
500g mozzarella cheese (good quality)
100g of soft feta cheese
chilli flakes
Baby rocket leaves to serve (dress with a little olive oil, lemon juice and salt and pepper)

For the mussel dressing, add 2 cloves of mince garlic, 2 tablespoon each of white wine and olive oil.

TIPS: after rolling out your pizza base, par bake in q hot oven (highest setting) for a few minutes. This ensures the pizza base will not be soggy in the center from the juices of the cooked seafood and dressing.

To arrange your pizza, spread enough tomato sauce to the pizza base, top one side with squid, capers, chilli flakes. The other side should be the mussels slightly drizzled with the dressing. Top the whole pizza with chunks of mozzarella cheese and a small sprinkle of feta and fresh basil.


Bake in the oven for about 12 minutes until base and cheese is golden! Serve with rocket leaves and extra lemon wedges.


Enjoy your best homemade pizza's ever!!!

A few other topping combination I have tried which are also awesome:
-Bolognese pizza (make a simple bolognese meat sauce)
-Chilli salami, fresh tomatoes
-Slice sweet potatoes, eggplants, mushrooms, spanish onions and capsicums!!!
all topped with lots of mozzarella and chilli flakes : )

Happy Eating!
Fat Pom Pom

Sunday, August 14, 2011

The Hardware Societe


Goodmorning my fellow brunch lovers!

I myself am not a morning person. I like sleeping in and staying up late. I don't function very well when I have to wake up really early, and I take twice as long to do anything if its earlier then 10am. hehe

I usually skip breakfast (which is a really bad thing) but like I said, my body doesn't work very well too early in the morning, and that also includes my appetite : )

Thats why I love the idea of Brunch! I love the different kinds of food they have available for breakfast. From the big breakfast which included eggs, bacon, sausage, hashbrowns to the simple cereal and milk. And with all the different restaurants and cafe's in Melbourne that serves brunch on the weekends....well I feel like I'm not missing out that much during the week!


Tea pot cosies at The Hardware Societe.....so adorable!

Well on one warm winters weekend, me and my boyfriend headed to The Hardware Societe at 120 Hardware Street, Melbourne. I was very excited about this little place as I've heard alot of good things about it : ) the places opens from 8.30am to 2.00pm on a Saturday and Sunday, so we headed out about 11.00am.

It was a cute little place, with quirky decorations, little yellow chairs, and cool wallpaper! Their menu offered a neat selection of seasonal produce and specialties. I heard that the menu changes with the seasons, so we didn't see any duck on the menu this time....: ( but I wasn't sad for long because there was loads of other awesome things to choose from!

In the end we pick a few to share....


Bircher - with Vanilla & Rosewater pears, raspberries and macadamias......mmmmmmmmmm

Baked Eggs - with Chorizo, Sofrito, and Manchego......yummy!!!!


Croque Madame - with Smoked Salmon, Gruyere, Horseradish creme fraiche, and fried duck eggs
......yummmooooo!!!

All three tasted super delicious and awesome mmmmm....making me hungry again now just thinking about it hehe the flavours and texture combinations are amazing! So much going on yet the balance is perfect, definitely a tasty and satisfying brunch session hehe

I will definitely would be returning here some day soon and trying out the other items on the menu!!!!! I definitely recommend this place for Brunch anyday : )

There's only a 2 weeks left of winter, YAY! Can't wait for the sunshine to return : )

Keep warm and happy eating!
Fat Pom Pom