Showing posts with label Desserts. Show all posts

Sunday, July 8, 2012

New York Cheesecake!


Hi All,

Cheesecake....who doesn't love a slice of perfectly baked cheesecake :) mmmm...

I was reminded of how much I love cheesecake just the other day when I had some from Brunetti! mmmmm dear friends of mine, am I too greedy for having such a love for delicious sweets and desserts?

I decided that it was time to make my first New York Cheesecake! The outcome....awesome and delicious as it looks!

This is my simple recipe! 
Ingredients:
350g of plain sweet biscuits, finely crushed in food processor
170g of unsalted butter, melted
750g of cream cheese, at room temperature
1 cup of caster sugar
2 tsp finely grated lemon rind
1/2 tsp of vanilla extract
2 tbsp plain flour
4 eggs
300 ml sour cream
fresh strawberries for decoration

Method:
1) Preheat oven to 160 degrees celcius. Line the base if a 23cm springform pan with non-stick baking paper.

2) Mix biscuits and melted butter in a bowl until well combined. Pressed the biscuit mix into the base and side of pan, press firmly, leaving about 1 cm at the top of the pan. Cover and chill in the fridge for about 30 minutes.


3) Place cream cheese, sugar, vanilla extract and lemon rind in a large bowl and beat with electric beater until just combine. Beat in flour, and then 1 egg at a time, beating well until just combined. Stir in the sour cream until just combined.

4) Pour the cream cheese mixture into the base. Place the pan on a baking tray and bake for 1 and 1/4 hours or until the centre is just slightly still wobbly. Turn off oven, with door ajar for about 2 hours. Then refrigerate for about 4 hours or overnight to chill.


5) Served with sliced strawberries.


Enjoy life, love and the beautiful sunshine on a cold winters day!

Lots of Love 
Fat Pom Pom

Sunday, June 17, 2012

Homemade Apple Pie!


Hi everyone!

Nothing beats home made food, and who doesn't like Apple Pie, especially freshly baked, serve hot with a dollop of icecream or custard!! mmmmmm :) a great winter warmer to feed my hungry family who seems to always be starving of desserts these days...

This is a simple recipe, almost anyone can make this, and as usual a crowd pleaser! Why not make this at your next gathering of family and friends! Simple food does not always mean boring food, so roll up your sleeves boys and girls, its time to roll out the pastry.

Apple Pie ingredients:

8 granny smith apples, cored, peeled and chopped into 2cm chunks
2 tbsp caster sugar
pinch of grounded cinnamon
pinch of grounded cloves
2 tbsp water
1 tbsp of corn flour
1 tsp finely grated lemon zest

for Shortcrust Pastry
2 cups of plain flour
1/4 cup of self raising flour
150g unsalted butter, chilled, cubed
2 tbsp caster sugar
4-5 tbsp ice water

2 tbsp of jam (i used strawberry)
1 egg, lightly beaten
1 tbsp of sugar

Method:
1. To make the filling, place apples, sugar, lemon zest, cinamon, 2 tbsp of water in a small saucepan and simmer on low, stir occasionally for 8 minutes or until apples are soften.


2. Remove most of the water except for about 2-3 tablespoons. Add corn flour to the cooked apple mixture and leave to cool completely.

3. For the pastry, place sift both flours in a small bowl, rub butter into the flour until you get a breadcrumb like consistency. Stir in sugar, then make a well in the centre. Add almost all the water and mix, until the mixture comes together. Add more water if the dough is too dry. Gather dough together on a lightly floured surface. Press into a ball and divide into two, making one half a little bigger. Cover with plastic wrap and refrigerate for 20 minutes.


4. Preheat oven to 200 degrees C.  Roll out the larger piece of pastry between 2 baking paper to line the base and side of the pie plate. Line the pie plate with the pastry. Use a small sharp knife to trim away any excess pastry. Brush the jam over the base and spoon the apples into the shell. Roll out the other pastry between the baking paper until large enough to over the pie. brush with water around the rim then place the top on. Trim off any excess pastry, pinch the edges and cut a round hole or a couple of steam slits in the top.

5. Re-roll the pastry the scraps and cut into leaves for decoration. Lightly brush the top with eggs, then sprinkle with sugar. Bake for 20 minutes, then reduce the oven temperature to 180 degrees and bake for another 15 to 20 minutes, or until golden.

Enjoy this delicious pie with some custard and vanilla ice-cream!


Special thanks to Ninh for this recipe!

Lots of love,
Fat Pom Pom

Monday, May 28, 2012

High Tea at My House!

Look how beautiful our macarons turned out..

High Tea!! Its one of the most exciting things to be excited about since macarons hehe my family decided that we would have our own high tea at home! It was a really exciting day, everyone was busy taking care of their one dish to be placed on our 3 tier stand! Couldn't have been more please with everything that we made! Haha as usual, there was way too much food and everyone stuffed themselves to the point that no one could move for the rest of the night hehe

Our High Tea menu...

Our 3 tier stand filled with delicious goodies...

 Mini scones...mmmm so cute and yummy! It the background you can sort of see the marshmallows dipped in chocolate fondue and sprinkle with crushed peanuts!

 Roast Chicken & Avocado, Salmon & Cream Cheese, Egg & Mayonnaise sandwiches...with crusts removed of course hehe

 Home made Sausage Rolls, a Masterchef recipe!

 Candy Glazed Chorizo...inspire from a Jamie Oliver recipe! So yummy

 Quiches...this is a family recipe we have been making for years...mmm

 Pink and Blue French Macarons, so adorable and delicious!

Oh how could I forget tea... you can't have High Tea without tea!

Unfortunately, I wasn't able to catch a perfect picture of our Pumpkin Soup, Deconstructed Lemon Tart and Fondue made by the boys in our family, but they were all super delicious and worthy of a special thanks for their efforts...yes boys can cook in our house!! :D

Why not do your own high tea at home with some of your family and friends? it is just as much fun, if not more then the real thing...you can even dress up and have a glass of champagne at home!!

Lots of Love,
Fat Pom Pom

Monday, May 14, 2012

Sticky Date Pudding with Butterscotch Sauce

Hi guys!

I made some Sticky Date Pudding for desserts on Sunday Night. I must admit sticky date puddings are one of my favourites desserts to eat, well besides cheesecakes, red velvet cupcakes, carrot cakes and a whole heap of Vietnamese puddings! Haha well to be honest, I just like desserts in general :D Sticky date puddings are perfect for winter, and yes even better with ice-cream on the side!

The first time I had sticky date pudding, it was my boyfriend that made them for me. I am still using his recipe up to this day and its definitely a keeper, just like him! hehe

Anywhos, heres my simple recipe for Sticky Date Pudding:

Ingredients:
1 and 1/4 cup of pitted dates, chopped
1 and 1/4 cup of boiling water
1 teaspoon of baking soda
60g of butter, cubed
3/4 cup of brown sugar
2 eggs
1 cup of self raising flour

Butter Scotch Sauce
1 cup of brown sugar
3/4 cups of thick cream
50g of butter
1 teaspoon of vanilla essence

Method:


  1. Preheat the oven to 180 degrees Celcius. Grease a 20cm round cake tin and line the base with baking paper.
  2. Combine the dates, baking soda and boiling water in a bowl. Stand for 5 minutes, and blend or process the date mixture with butter, brown sugar until smooth.
  3.  
  4. Pour mixture into a large bowl, add the eggs and flour and mix well until just combined.
  5. Pour into the prepared tin and bake for 35 to 40 minutes or until cooked through. 
  6. Stand the pudding for 10 minutes before turning out of the tin.
  7. To make butter scotch sauce, combine all ingredients for butter scotch sauce in a small pan over low heat and stir until sugar has dissolved and butter has melted.
  8. Served cake warm, drizzle with sauce and icecream on the side.
Enjoy your masterpiece hehe well actually it was quite simple but not to say that it was not delicious, cause it was, tasted even better the second day when I microwave a small portion to reheat...there's never enough desserts to go around in my house!!

Keep warm and happy eating!
Lots of Love,
Fat Pom Pom

Friday, May 11, 2012

White Chocolate and Raspberry Cheesecake


Who doesn't love cheesecakes? well you certainly ain't my friend if you don't...heheh just kidding.

Hope everyone is keeping warm as Melbourne is heading towards another cold winter. Brrrrrr. I'm please to say that my appetite for making desserts is back! YAY. I've always use to make desserts after dinner everyday, but I don't know what has happened in the past few months but I just didn't have the drive that used to be in me. Well it has finally come back and I couldn't be more happy!

Some might say "what...cheesecakes in winter...and frozen berries...you must be joking" hehe no in my house, we can eat anything for desserts, even icecreams in winter hehe

This cheesecake recipe is really simple yet the finished cheesecake tastes absolutely delicious!!! One of the best cheesecakes I have ever tasted! It surprised me because it was so easy to make. I will definitely be making this recipe again and again, next time with other seasonal fruits and berries, eg. Passionfruit, strawberry, lemon...you can be really creative and use any fruits you want!

Heres the recipe:

White Chocolate and Raspberry Cheesecake

Ingredients

Base
1 1/4 cups shortbread biscuits, crushed
75g butter, melted

Filling
500g block cream cheese, softened (i used Philadelphia)
3/4 cup white sugar
2 teaspoon grated lemon rind
2 teaspoons gelatine dissolved in 1/4 cup boiling water, cooled slightly
200g white chocolate, melted
3/4 cup thick cream, lightly whipped
1/2 cup fresh or frozen raspberries

To garnish
200g fresh or frozen raspberries, extra
Icing sugar

Method:
Combine the biscuits and butter and press into the base of a lightly greased 22 cm spring form pan. Refrigerate for 10 minutes.


Meanwhile, beat the cream cheese, sugar, and lemon rind with an electric mixer until smooth. Stir in the gelatine mixture and fold in the melted chocolate, cream and 1/2 cup of raspberries.

Pour the filling into the prepared base. Refrigerate for 3 hours or until set. Garnish with extra raspberries and dust with icing sugar before serving!

I hope you guys enjoy this recipe, its sure to be a crowd pleaser, tastes delicious and looks beautiful! Almosts too pretty to eat.

Keep warm and happy eating!
  
Lots of Love,


Fat Pom Pom

Wednesday, April 25, 2012

Anzac biscuits for Anzac Day


Hi Guys,

My sister made some Anzac biscuits to celebrate Anzac day and they turned out delicious!!! They are really easy to make and super yummy : )

Here's the recipe:

1 cup of plain flour
1 cup of rolled oats
3/4 desiccated coconut
3/4 cups of brown sugar
125g butter
2 tbsp golden sugar
1 tsp bicarbonate of soda
2 tbsp water

  1. Preheat the oven to 160 degree C. Line two baking tray with non stick baking paper. Sift the flour into a large bowl. Stir in the oats, coconut and brown sugar.
  2. Put the butter, golden sugar and 2 tbsp of water in a small saucepan. Stir over medium heat until melted. Stir in the bicarbonate of soda.
  3. Pour the butter mixture into the flour mixture and stir until combined.
  4. Roll level tablespoon of mixture into balls. Place on the trays, about 5 cm apart.
  5. Press with a fork to flatten slightly. Bake for 10 minutes or until golden brown.
  6. Set aside on the trays for 5 minutes and transfer to a wire rack so it cools completely.
Thanks all there is to it! I love eating the biscuits when they are still warm...mmmmmm : )


Keep warm and enjoy work off today!!!

Lots of love,
Fat Pom Pom

Wednesday, April 4, 2012

Lemon Meringue Pie!


Hi Guys!!!

Sorry its been the longest time since I have posted anything. I feel so bad since I promise that I will be posting on Hong Kong next. Its just that I've been so busy with work and other things at home. It didn't hit me that its been over a month since I last posted :(

Well to make it up to you, I have a very special recipe to share with you guys. In fact, this is a friends recipe : ) A good friend of mine who I might say is the best amateur pastry chef I've met hehe I invited her over to my house over the weekend to make her recipe of Lemon Meringue Pie! mmmmmm

The outcome.....the best Lemon Meringue Pie I have ever eaten hehe the pastry was crumbly and perfect, the lemon filling was delicious and the meringue....welll what can I say, it tops it all ; P hehe it was a delicious pie and leaves you drooling for more!

I have the privilege to share this recipe with you:

Pastry Base:
1 cup of plain flour
90g of unsalted butter, chilled and diced
1-2 tbsp icing sugar
1-2 tbsp of cold water


Lemon filling:
1/4 cups of corn flour
1/4 plain flour
1 cup of caster sugar
3/4 cup lemon juice
3 tbsp grated lemon rind
40g unsalted butter
6 eggs yolks

Meringue topping:
6 eggs white
1 and 1/2 cup of caster sugar
1/2 teaspoon cornflour

Method:

  1. For the base, sift the flour into a bowl and rub in the butter using your fingertips, until the mixture is breadcrumb like. Stir in the icing sugar, and add about 1 tbsp of water into the mix, kneed gently and if dough is still dry, add a little more water.
  2. Gather the dough together roll between 2 sheets of baking paper until large enough to line the base and side of pie plate. Line the plate with the pastry and trim off any excess pastry. Fork the edge and refrigerate for 15 minutes.
  3. Preheat oven to 180 degrees C. Line the pastry shell with baking paper and pour in some baking beads or uncooked rice. Bake for 10-15 minutes, then remove the paper and beads. Return pastry to oven for another 10 minutes or until cooked through. Cool completely.
  4. For the lemon filling, put the flours and sugar in a saucepan. Whisk in lemon juice, rind and 1 and 1/2 cups of water. Whisk over medium heat until mixture boils and thickens. Then reduce heat and cook for 1 minute. Remove from heat, then whisk in butter, and then egg yolks one at a time. Cover the surface with plastic wrap and cool. Spread the filling into the pastry shell.
  5. For the Meringue topping, put the egg whites and sugar into a clean, dry bowl. Beat with electric beater on high for 10 minutes, or until sugar is almost completely dissolved and the meringue is thick and glossy. Beat in the cornflour. Spread the meringue over the top of the pie, making peaks by drawing the meringue up with a knife, piling it high towards the center. Bake for 5-10 minutes or until lightly browned. Cool before serving.
  6. Enjoy!!!!!

Feast on yours on how perfect the Lemon Meringue Pie turned out!! Can't be more pleased by the outcome!


I hope you enjoyed this post!! Thanks again Ninh for making some of the best desserts I have ever eaten! Well people, don't just sit there and drool over our pie, make yourself one :D

P.s. Hong Kong will be coming soon!


Lots of Love
Fat Pom Pom

Friday, September 30, 2011

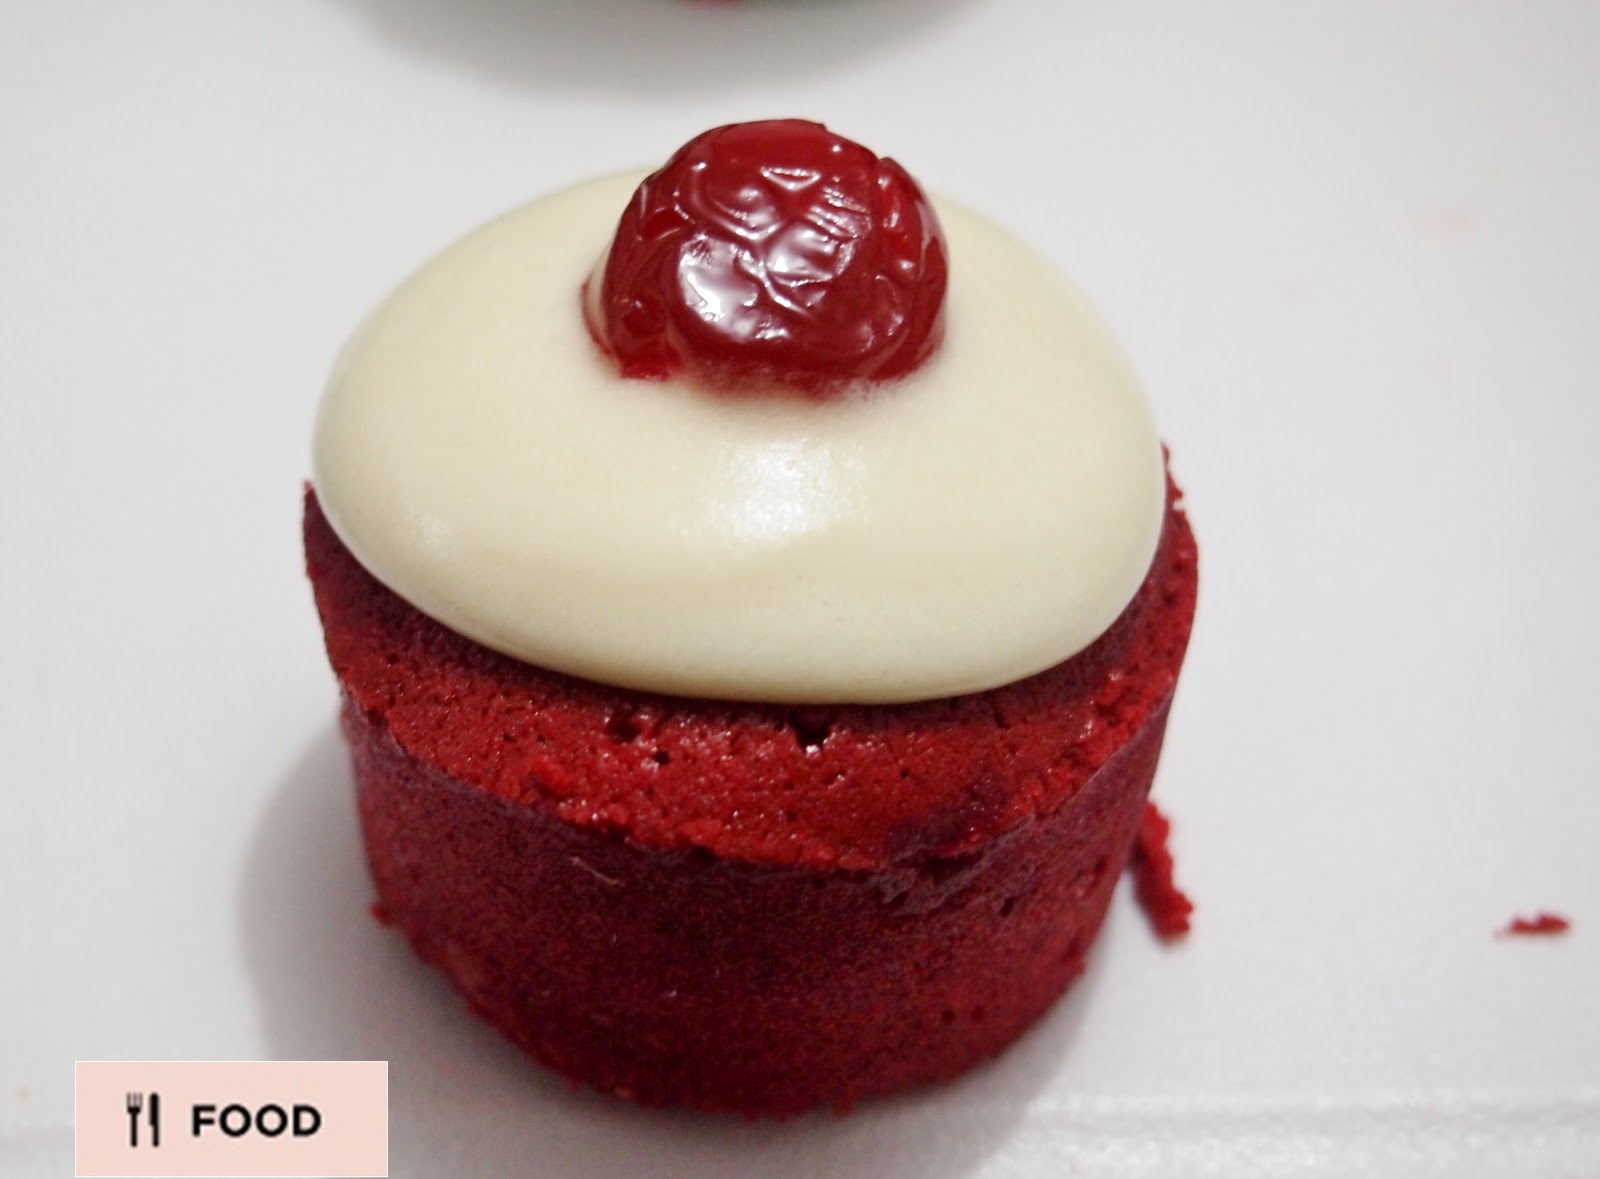
Red Velvet Cupcakes with Cream Cheese Frosting


Yumm....ain't these the cutest cupcakes you've ever seen!!

Red Velvet Cupcakes would have to be one of the most prettiest cupcakes that are out there!!! A beautiful rich red colour, fluffy yet super moist delicious chocolate cupcake, topped with a sweet and creamy cream cheese frosting....mmmm yummmmm!!! One taste and you'll be coming back for more : )

I made these over the weekends, using the new cupcake casings I purchased especially just to make these cupcakes. The casings are so pretty I didn't want to rip them apart when eating the cupcakes hehe

This is my recipe:
Ingredients (makes 30 cupcakes)

2 and a 1/2 cups plain flour
2 tablespoon unsweetened cocoa powder
1 teaspoon baking powder
1/2 teaspoon salt
1 cup butter, softened
2 cups caster sugar
4 eggs
1 cup sour cream
1/2 cup milk
2 tablespoon of red food colouring
2 teaspoons vanilla extract
 
Vanilla Cream Cheese Frosting:
250g tub of cream cheese, softened
1/4 cup butter, softened
2 tablespoons sour cream
2 teaspoons vanilla extract
2 cups of icing sugar

Method:
1. Preheat oven to 180 degrees C. Sift flour, cocoa powder, baking powder and salt in medium bowl. Set aside.
2. Beat butter and sugar in large bowl with electric mixer on medium speed 5 minutes or until light and fluffy. Beat in eggs, one at a time. Mix in sour cream, milk, food color and vanilla. Gradually beat in flour mixture on low speed until just blended. Do not overbeat. Spoon batter into 30 paper-lined muffin cups, filling each cup 2/3 full.


3. Bake 20 to 25 minutes or until toothpick inserted into cupcake comes out clean. Cool in pans on wire rack 5 minutes. Remove from pans; cool completely. Frost with Vanilla Cream Cheese Frosting.


4. Vanilla Cream Cheese Frosting: Beat cream cheese, softened, butter, sour cream and vanilla extract in large bowl until light and fluffy. Gradually beat in icing sugar until smooth.


I also add a glace cherry on top to make them look super adorable!!!


So many cupcakes.....


You will sure win the crowd over with these lovely and delicious cupcakes!

Happy Eating my lovely readers!!
Fat Pom Pom


Friday, September 23, 2011

Chocolate Crackles!


mmmm....remember these? yummmmmm...super awesome!

The last time I had one of these Chocolate Crackles, I was in primary school, where we had one of those school fairs and our parents would cook a dish for us to bring to school to sell and fundraise for the school. There would always be someone's parents who made these Chocolate Crackles and they were sold for around 20 cents. As a kid, I remember these were awesome!!

Only until recently did my boyfriend eat theses again at Melba (Langham Hotel Melbourne) that it reminded me of how much I used to love these chocolate crackles.

This is the recipe for the Chocolate Crackles:

Ingredients

4 cups Rice Bubbles
1 cup icing sugar
1 cup desiccated coconut
250g copha, chopped
3 tbsp cocoa

Method
In a large bowl, mix the rice bubbles, icing sugar, cocoa & coconut.

Slowly melt the copha in a saucepan over a low heat.

Allow to cool slightly.

Add to Rice Bubbles mixture, stirring until well combined.

Spoon mixture into paper patty cases and refrigerate until firm.

Enjoy!!! It's as simple as that : )


They are still as awesome as I remember!

Happy Eating
Fat Pom Pom

Tuesday, August 9, 2011

Chocolate Mousse!


Yummy chocolate mousse!!! Don't they look adorable in these little Japanese tea cups?

Mmmmmm...chocolate mousse, one of my favourite desserts!!! yes I know I know, I have way too many favourite desserts hehe the best chocolate mousse that I have eaten would have to be at Jacques Reymond!!! I long for the day I am able to make my chocolate mousse as good as Jacques Reymond : ) but in the mean time, I will enjoy my homemade chocolate mousse recipe which is simple, yummy and recieves the nod of satisfaction from my boyfriend and family! Im pretty happy with that : )

Here is the recipe for you chocolate lovers out there!!!!

Ingredients (serves 8)

200g dark cooking chocolate
20g butter
1 teaspoon vanilla extract (or if you like alcohol, add a tablespoon of Tia Maria instead)
250ml (1 cup) thickened cream
3 small eggs, separated
125ml (1/2 cup) thickened cream, extra
6 cherries (or any of your favorite fruit, strawberries, oranges, mangoes, kiwi fruit....)


Method

Place chocolate, butter and vanilla in a heatproof bowl. Place over a saucepan of simmering water (make sure bowl doesn't touch water). Use a metal spoon to stir for 5 minutes or until chocolate is melted and mixture is smooth.


Remove bowl from heat. Set aside for 5 minutes to cool slightly. Use metal spoon to stir egg yolks into chocolate until well combined.

Use an electric beater to beat the cream until soft peaks form. Use a metal spoon to gently fold the cream into the chocolate mixture until combined.

Use an electric beater to beat the egg whites in a large, clean dry bowl until soft peaks form. Use a large metal spoon to fold half the egg whites into the chocolate mixture. Fold in the remaining egg whites until combined.


Spoon chocolate mixture evenly into eight serving glasses or serving dishes. I Cover with plastic wrap. Place in the fridge for 3 hours or until firm.
 
To serve, top with a cherry or your favourite fruits.

TIPS: Something I would do extra next time is to add some chopped fruit to the bottom of the glass before adding the mousse to the glass. That way you get extra surprise hits of your favourite fruit!

Enjoy!!!


Oh I forgot to tell you guys I just came back from a weekend of snowboarding at Mt Hotham!!!! Was it awesome? YES!!!!

Bruised and battered is what I came back as, but was definitely worth every bit of pain :) I love the snow!! I feel inspire to make a dessert that involves snow (or at least ice hehe) similar to the Ice Kacang but filled with all my favourite toppings!

Let me know how your chocolate mousse turns out!

Happy eating!
Fat Pom Pom